
15% Off Accessories Through Aug 10 · Use Code NEEDIT2026

Pump Repair Kits

Restore lost pressure, stop leaks, and extend the life of your pressure washer with the right pump repair kit. Matching the kit to your exact pump model prevents repeat failures and saves time on the job. This category groups seal, valve, packing, and complete rebuild kits so you can service common triplex plunger and diaphragm pumps with confidence. Use the guide below to confirm fit, choose the correct kit type, and prep for a smooth install.

Brand

Price

Speed Control

ACCESSORIES SALE
15% Off the Parts That Keep You Working

Stock the truck, replace worn parts and keep the next job moving. Use code NEEDIT2026 through Aug 10th.

Pump Repair Kits: Selection, Symptoms, and Installation Tips

How to confirm compatibility

  • Find the pump data plate on the crankcase or manifold and note the full model and series (include any suffixes).
  • Match by pump model first, then verify plunger diameter and kit material (e.g., Buna-N, FPM, PTFE blend) listed for that model.
  • Order kits in the quantity required by the pump design: most pumps use one seal kit; some valve arrangements require two valve kits.
  • Replace seals, packings, and valves as complete sets—do not mix new and worn components in the same head.

Keep the old parts laid out in removal order. It speeds reassembly and helps verify every new component is installed.

Choose your kit type

Seal Kits (Low/High-Pressure)

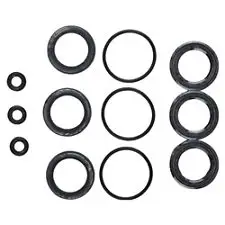
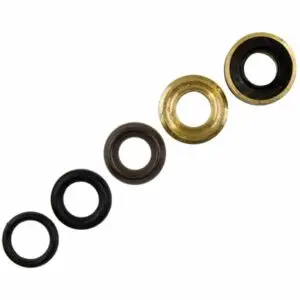
Restore sealing around each plunger to correct weeping, loss of pressure, or water in the crankcase. Typical contents include low- and high-pressure seals and related O-rings.

Packing Kits

Used on pumps that employ V-packings or stacked packings instead of conventional lip seals. Ideal when leakage occurs at the head or pressure drops under load.

Valve Kits

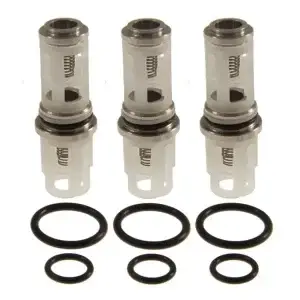
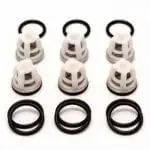
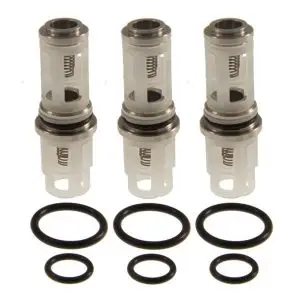
Refresh inlet/discharge check valves to correct pulsing, slow priming, cavitation symptoms, or pressure instability. Contents typically include complete valve assemblies and seats.

Complete Overhaul Kits

Bundle the critical wear parts (seals/packings and valves) to reset pump performance when hours are high or history is unknown.

Quick symptoms-to-solution table

Symptom Likely Cause Recommended Kit
Water weeping between pump head and crankcase Worn low- or high-pressure seals / packings Seal Kit or Packing Kit
Slow priming, surging, or unstable pressure Debris or wear in check valves Valve Kit
Milky crankcase oil Water ingress past oil seals/packings Seal Kit (inspect oil seal)
Persistent pressure loss after seal service Valve leakage or plunger damage Valve Kit (inspect plungers)

Equipment Selection Notes

  • Always match kit material to your application (temperature, chemical exposure, and duty cycle). Upgrading material without confirmation can reduce life.
  • Plunger diameter must match the listed size for your model—mixing diameters or styles will damage the pump.
  • Some stacked or split valve designs require two valve kits per pump; confirm quantity in the parts breakdown for your exact model.
  • Many triplex pumps offer both seal kits and alternative packing kits by series; select the style specified on your model’s parts list.

Torque values, gasket orientation, and seal lip direction vary by pump family. Always follow the service manual for your exact model. Do not overtighten valve plugs or manifold bolts.

Before you rebuild

  • Flush the water supply and inlet filter to keep debris out of new valves and seals.
  • Inspect plungers for scoring or cracks; replace if damaged before installing new seals or packings.
  • Change pump oil if contaminated and refill with the manufacturer-recommended non‑detergent oil after service.
  • Verify unloader settings after reassembly to avoid over-pressurizing fresh components.

Learn more

Need help matching a kit to your pump?

Our team can confirm fitment by model and advise on seal materials, valve styles, and quantities before you order.

Talk to an Equipment Specialist

Pump Repair Kits FAQ's

Change contaminated oil, verify unloader settings, purge air, and recheck for leaks under load. Keep inlet filtration clean to protect new valves and seals.
Yes. Replace seals/packings and valves as complete sets on all cylinders to maintain even compression and performance.
Basic hand tools work for most pumps, but some larger frames use dedicated seal-case or valve tools. Always follow the service manual and torque specifications for your model.
No. Use one material set matched to your application and listed for your pump model. Mixing materials or partial replacements can shorten service life.
If priming is slow, pressure surges, or pulsation persists after seal service, replace the valve kit. Cleaning may help with minor debris, but worn springs, seats, or cages require a new kit.
Weeping at the manifold, loss of system pressure, or water intrusion into crankcase oil. Inspect plungers and oil seals and replace seals/packings as a complete set.
Locate the pump’s model and series on the data plate, then match that exact model to the parts breakdown. Confirm plunger diameter and kit material. Most pumps use one seal kit; some valve designs require two valve kits—follow the parts list for your model.
Home Backup - 2-2-24
Special Offer
PowerWash Prime Membership